0 K+
Projects Completed
Ariston Water Heater Repair

Ariston Water Heater Service Center Dubai

Is your Ariston water heater malfunctioning or failing to provide hot water? Whether you're experiencing inconsistent temperatures, unexplained leaks, or a complete lack of heating, our Ariston-certified technicians at the Ariston Water Heater Service Center in Dubai deliver prompt, effective, and dependable services across Dubai.
Ariston Water Heater Service Center Dubai specializes in servicing all models of Ariston water heaters, including wall mounted storage water heaters, stab floor standing and solar-powered systems. We guarantee your unit operates safely and efficiently with premium repairs and authentic manufacturer parts. Our specialized team is ready to support you with urgent emergency fixes.

OUR SERVICES

Professional Repairs for Ariston Appliances

hendre
hendre

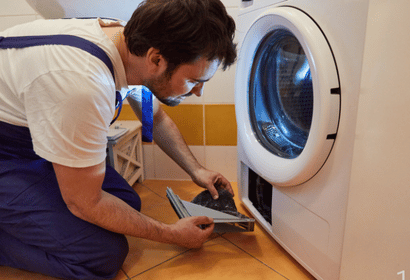
Ariston Washing Machine Repair

Expert repair solutions for all Ariston washing machine issues.

hendre
hendre

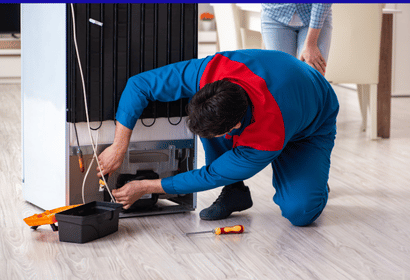
Ariston Refrigerator Repair

Reliable repairs to restore the cooling efficiency of Ariston fridges.

hendre
hendre

Ariston Dishwasher Repair

Fixing all Ariston dishwasher problems for smooth operation.

hendre
hendre

Ariston Cooking Range Repair

Professional servicing for Ariston cookers to ensure safe cooking.

hendre
hendre

Ariston Tumble Dryer Repair

Quick repairs for Ariston dryers to keep your clothes drying perfectly.
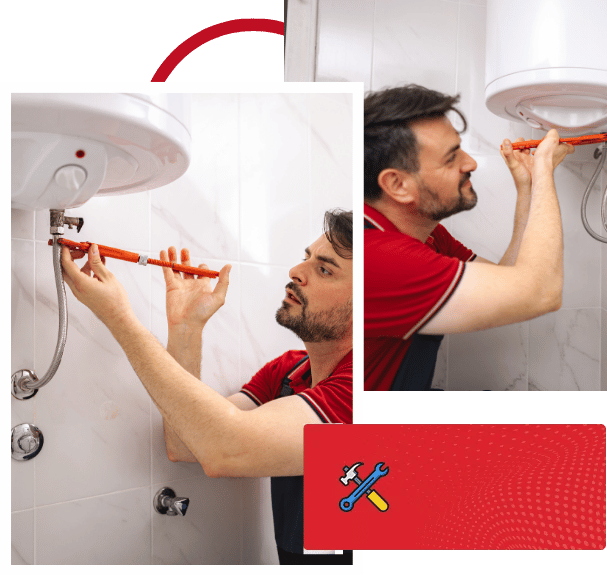
Ariston Solar Heater Repair - Ariston Water Heater Service Center

If you can identify the most common Ariston water heater problems, it will help you decide when to schedule a professional at Ariston water heater service center. Here are some frequent issues Ariston water heater owners encounter:

No Hot Water
The cause of this issue could be a failed heating element, a tripped thermostat, or a broken dip tube that prevents water from heating properly. Ariston Water Heater Service Center technicians can diagnose and resolve heating problems efficiently.

Inconsistent Water Temperature
A malfunctioning thermostat, a heavily scaled heating element, or a faulty temperature sensor often leads to unpredictable water temperatures. Our Ariston Water Heater Service Center Dubai specialists will address all issues to ensure stable hot water delivery.

Water Leaks or Pooling
A corroded storage tank, loose plumbing connections, or a damaged pressure relief valve can cause concerning water leaks around your unit. Our Ariston Water Heater Service Center employs certified technicians to perform urgent water heater repairs and prevent water damage.

Discolored or Rusty Water
Corrosion inside the tank or a failing anode rod can lead to rusty water coming from your taps. At this stage, you should contact our Ariston water heater repair specialists in the UAE to assess and restore your water quality.

Strange Noises from the Heater
Popping, rumbling, or banging sounds from your Ariston heater typically indicate sediment buildup in the tank or a failing heating element. Ariston water heater service center provides comprehensive Ariston water heater repairs to eliminate these noises and restore quiet operation.

Foul-Smelling Hot Water
Bacteria growth in the tank due to low temperatures or a depleted anode rod can cause unpleasant sulfur smells in your hot water. Our experienced technicians at Ariston water heater service center will inspect and treat your system to eliminate odors and ensure fresh, clean water.

Why Ariston Heater Service Center Dubai?

Suppose you’re searching for an Ariston Water Heater Service Center to get the best installation service for your Ariston electric water heater or solar water heater. In that case, we have the expert staff at the Ariston water heater service center to provide solutions to all the problems your heater may have. Here are some points you should be proud of while choosing Ariston Service Center UAE:

Same-day repairs: Get your Ariston water heater inspected and fixed promptly. We provide same-day service for Ariston water heater installation.
Certified and factory-trained Ariston technicians: We have specialists for all Ariston heaters.
Fast and authentic heater repairs: We will minimize the downtime with efficient Ariston water heater repairs.
Genuine Ariston spare parts: We use original components in all the repairs for the durability of your appliances.
Affordable and transparent pricing: You won’t see any hidden or surprise charges, just fair rates.

Ariston Electric Heater Replacement Process: A Complete Step-by-Step Guide

Replacing an Ariston electric water heater—whether due to a burnt-out heating element, a failing thermostat, or the unit reaching the end of its lifespan—requires careful attention to safety and proper procedure. This guide provides a comprehensive overview of the replacement process, from official Ariston water heater service center and professional service experience.

🔧 When to Consider Replacement

Before diving into the replacement process, it’s important to recognize the signs that indicate your Ariston water heater needs attention:

No hot water
The heating element may have burnt out, the thermal cut-out may have operated, or the thermostat could be faulty.

Insufficient hot water
The unit may be nearing the end of its lifespan or suffering from scale buildup.

Water leaks
Corrosion or damage to the tank or pipes may require replacement.

Unusual noises
Banging, clanking, or hissing sounds can signal internal component failure.

Rust or corrosion
Visible rust on the tank or pipes can lead to leaks and water contamination.

⚠️ Important Safety Precautions
  1. Isolate the electrical supply: Switch off the mains electrical supply and remove the fuse to ensure no power reaches the unit during work
  2. Turn off the water supply: Close the service valve or cold water supply to prevent water flow during disassembly
  3. Drain the unit: If replacing the heating element or working on the tank, the appliance must be properly drained first
  4. Allow cooling: Hot water inside the tank can cause severe burns—wait for the unit to cool before beginning
  5. Use genuine parts: All repairs and replacements should only be performed using approved Ariston spare parts to maintain safety and warranty validity
WARNING: Water with a temperature higher than 50°C can cause serious burns. Always verify water temperature before performing any work.

🔄 Complete Replacement Process - Ariston Water Heater Service Center

Step 1: Power Isolation and Water Shut-Off
  1. Switch off the mains electrical supply to the water heater at the circuit breaker
  2. Remove the fuse if applicable to ensure complete isolation
  3. Close the service valve or cold water supply valve to stop water entering the unit
  4. Open a hot water tap to relieve pressure in the system
Step 2: Drain the Water Heater

Draining requirements vary by model:

  1. Andris R series (under-sink models): Disconnect pipes and remove the heater from the wall
  2. Andris R series (over-sink models): Undo the cold water supply pipe and open a hot water tap to drain
  3. THER series: The appliance must be drained to enable replacement of the armored heating element
  4. Steatite and Professional TECH series: No need to drain the appliance for heating element replacement—these models allow element access without draining

For units requiring drainage:

  1. Place a bucket underneath the drain valve or lowest connection point
  2. Open the drain valve or disconnect the cold water inlet to allow water to flow out
Caution: Removing flange screws on certain models will release stored water


Step 3: Access the Heating Element and Components
  1. Unscrew the screws securing the front cover (typically 2 screws on most models)
  2. Remove the cover carefully to expose the electrical components, thermostat, and water container
  3. Locate the heating element—usually mounted at the bottom or side of the tank

For Andris R models:

  • The heating element may be removed after taking out the thermostat phials (on 30L models) by undoing the M6 nut
  • The assembly should then be turned through 90° anti-clockwise to ease removal from the water container
Step 4: Disconnect Electrical Connections
  1. Note wire positions or take a photograph to ensure correct reconnection
  2. Disconnect wires from the heating element terminals
  3. Remove the thermostat phials carefully if present—these are temperature-sensing probes that extend into the tank
Step 5: Remove the Old Heating Element
  1. Undo the mounting nut or bolts securing the heating element
  2. Remove the heating element from the tank
  3. Inspect the sacrificial anode (if accessible) for corrosion or depletion. The anode should be checked annually and replaced as necessary
  4. Clean the element flange area of any scale or debris
Important Note: If the heating element is heavily coated with scale, descaling and removal of lime deposits should be performed at the time of inspection.


Step 6: Install the New Heating Element
  1. Apply PTFE tape to threaded connections if required
  2. Insert the new heating element into the tank opening
  3. Secure the element by tightening the mounting nut or bolts to the specified torque
  4. Reinsert thermostat phials into their original positions (for models with external thermostats)
  5. Reconnect wires to the heating element terminals following the original configuration
Step 7: Reassemble and Refill
  1. Reattach the front cover, ensuring the regulation knob is properly coupled with the thermostat
  2. Open the cold water supply to refill the tank
  3. Open a hot water tap to allow air to escape from the system
  4. Wait until water flows steadily from the tap, indicating the tank is full
  5. Check for leaks around all connections
 
Step 8: Restore Power and Test
  1. Restore power by switching the circuit breaker on and replacing the fuse
  2. Set the thermostat to the desired temperature (recommended maximum 60°C in hard water areas)
  3. Allow 30 minutes for the temperature to stabilize between settings
  4. Check that the neon light (if present) illuminates, indicating the heating element is working under thermostat control
  5. Verify hot water is reaching the taps at the expected temperature
Step 9: Final Checks
  1. Inspect for leaks after the unit has reached operating temperature
  2. Check the thermal cut-out has not operated—if it has, the cause must be found before resetting
  3. Test pressure relief valves where fitted by lifting the test lever or turning the test knob
  4. Confirm proper disposal of the old unit, adhering to environmental regulations

🔍 Post-Replacement Testing and Maintenance

Test Safety Devices

After replacement, test all safety components:

  • Temperature & pressure relief valve: With water supply on, lift the test lever or turn the test knob to ensure the valve opens and closes properly
  • Expansion relief valve: Test manually by turning the test knob
  • Thermal cut-out: Verify it has not operated; if it has, investigate the cause before resetting
Annual Maintenance Requirements

To maintain warranty validity and ensure optimal performance:

  • Check the sacrificial anode annually and replace as necessary
  • Descale the heating element if heavily coated with lime deposits
  • Inspect cold water controls where fitted, including line strainer cleaning and expansion vessel pressure checks
Hard Water Considerations

In areas with hard water (>200 mg/l), Ariston recommends:

  • Installing a water softener to reduce limestone precipitation in the heat exchanger
  • Setting the maximum temperature to 60°C to minimize scale buildup
Note: The warranty does not cover damage caused by limestone
📞 When to Call a Professional at Ariston Water Heater Service Center

While this guide provides a comprehensive overview, certain situations warrant professional assistance:

  • If you’re uncomfortable working with electrical or plumbing components
  • If the thermal cut-out has operated—the cause must be identified before resetting
  • If the unit requires sealed system repair (refrigerant leaks, compressor issues)
  • If the unit is under warranty—only authorized service centers should perform repairs to maintain coverage
  • If you lack proper tools or testing equipment

Ariston recommends contacting their customer service team at Ariston water heater service center for technical support.

✅ Summary

The Ariston electric heater replacement process at Ariston Water Heater Service Center involves:

  1. Safety first — isolate power and water supplies
  2. Drain the unit (if required by model type)
  3. Remove the cover to access components
  4. Disconnect and remove the old heating element
  5. Install the new element with genuine Ariston parts
  6. Reassemble and refill the tank
  7. Test thoroughly for leaks and proper heating
  8. Perform annual maintenance to extend lifespan

With proper attention to safety and adherence to model-specific procedures, replacing an Ariston heating element or thermostat can restore your water heater to reliable operation. However, when in doubt, professional service ensures the job is done correctly and safely.

TESTIMONIALS

Reviews About Ariston Water Heater Service Center

booking now

Book A Service Online

    Common Service Areas

    Ariston UAE Service Center

    hendre

    Dubai

    • Al Barari
    • Damac Hills
    • Dubai Hills Estate
    • Dubai Silicon Oasis
    • Jumeirah Golf Estates
    • Blue Waters Island
    • Downtown Dubai
    • Al Barsha
    • Mirdif
    Call Now
    hendre

    Sharjah

    • Al Jada
    • Al Nahda
    • Al Qasimia
    • Al Rahmania
    • Al Taawun
    • Al Qasba
    • Al Majaz
    WhatsApp Us
    hendre

    Abu Dhabi

    • Al Reef
    • Musaffah
    • Al Bateen
    • Al Khalidiyah
    • Mohammed Bin Zayed City
    • Al Karamah
    • Al Mushrif
    • Al Muroor
    • Danet
    Call Now
    Ariston UAE Service Center

    Ready to Book Your Service?

    Call Us For Free Consultation

    Ariston Service Center
    Ariston Gas Range Service Center

    Freequently Asked Questions